The Wisconsin State Fair is on of my favorite events. I have an opportunity to work in a beautiful space and meet and chat with gardeners as we discuss ways to increase our gardening success.
If you were able to join me at this year’s event, thanks. I know there is much to do and see at the fair. Whether you were able to join me or not, I hope this expanded version of my handout helps you in your gardening efforts.
I have included information on all three topics; Affordable Food Gardening, Ornamental & Edible Container Gardening Success, and Tips for Growing Your Favorite Vegetables here. You will find links to more information from a variety of sources including webinar recordings, audio tips and videos available to watch or review for free on my website. Read through the whole article or scroll through to find the topic of interest.
Affordable Food Gardening
The rising cost of food has many of us looking to our gardens for a bit of budget relief. Growing your own food can boost the flavor and nutritional value of our snacks and meals as well as save you money. Here are a few tips for getting the most value from your gardening efforts.
Create a Healthy Foundation
Most of us do not have ideal soil to grow vegetables. We can buy soil to create or fill raised beds, amend what we have or create our own with lasagna and Hugelkultur. Investing time and resources in creating a healthy soil foundation will boost the health and productivity of your garden, reduce pest problems and minimize maintenance throughout the season and in future years.
When purchasing compost, mulch, and topsoil ask about how they manage jumping worms. These invasive worms devour organic matter and spread at an alarming rate. They ruin soil structure making it difficult for plants to grow. Researchers are looking for management solutions but there is currently no control for this invasive worm. so prevention is the best solution.
Deciding What to Grow
Take time to create a plan. It doesn’t have to be fancy but having a plan can help you avoid overspending on seeds and plants you don’t have space to grow, time to tend or your family won’t eat. I discuss the following tips and more in my How to Plan a Vegetable Garden webinar (password: JLU+i2#h) and handout.
- Focus on vegetables that help reduce your food budget. Grow those that are more expensive to purchase or provide a large harvest for the space needed to grow. Tomatoes, greens and sweet peppers are a few favorites to consider. Sweet corn is fun and delicious to grow but requires more space than a single tomato plant that produces an average of 8 pounds or more per plant.
- Include vegetables you and your family like to eat fresh. Some vegetables like greens, broccoli and peas taste best when harvested from the garden and served the same day.
- Create a garden that is a size you are able and willing to manage. Review your schedule and make sure you have sufficient time throughout the growing and harvest season to maintain, harvest and utilize all the vegetables you grow. A large garden will not yield greater results if it is not tended and harvested regularly throughout the season.
- Consider buying large quantities of vegetables you want to preserve at a farmers’ market. If you are new to gardening or have a busy schedule it may be easier to grow what you like to use fresh and stock up at the farmer’s market when it’s time to preserve. You will have the quantity needed when you have the time to preserve the produce.
- Plant a row or two to share with the food insecure in your community. Many are children and seniors that benefit from nutritional fresh produce. Even if you don’t plan for this most of us end up with extras to share. Contact your local food pantry or find one in your area that accepts garden fresh produce. Donating a part of your harvest helps increase the health of your community.
Maximize Productivity and Minimize Maintenance
Use labor and space saving strategies to maximize space and reduce time needed to grow a productive garden. You will be amazed by the amount of produce a small garden can yield.
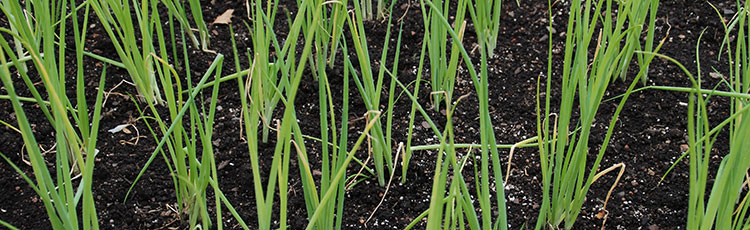
- Plant vegetables in wide rows. Provide each plant with just enough space to reach full size. You save space by eliminating the paths between each individual row of plants. This method works best in 4 to 5 feet wide beds that allow access to all parts of the garden for planting, weeding and harvesting.
- Interplant quick maturing vegetables like radishes, between those like cabbage and tomatoes that take longer to reach full size. By the time the bigger vegetables need the space you will have harvested those quick maturing veggies. You’ll grow more vegetables instead of weeds while waiting for your larger plants to fill in and cover that space.
- Make several plantings throughout the growing season with succession, also called relay planting. Once one vegetable is fully harvested, replant that space with another. Make sure the second or in some cases third planting will have time to mature before the end of your growing season. Check the seed packet or plant tag for the number of days from planting to harvest. Compare this with the number of frost-free days left in the growing season. Fertilize as needed when switching out plantings. Use a low nitrogen slow release fertilizer like Milorganite that won’t interfere with flowering and fruiting or burn plants when the weather is hot and dry.
- Go vertical by training vining crops like cucumbers, squash and melons onto a support and tomatoes onto stakes or in cages. You’ll save valuable garden space, reduce the risk of disease and make harvesting that much easier. Create a sling from cloth or macramé and attach it to the support to prevent the weight of large squash and melons from breaking the vines.
- Try square foot gardening. This intensive growing method requires great soil to maximize your harvest even when space is limited. You basically create a soil foundation of peat, compost and vermiculite similar to soilless container planting mixes. Then divide the garden into 1 foot squares. Seeds and transplants are grown with just enough space to reach full size.
Ornamental & Edible Container Gardening Success
Container gardens help expand planting space, provide vertical accent in the garden, make gardening more accessible and bring the garden closer to the grill and kitchen and into your outdoor living space. Unlike growing in the ground the smaller volume of soil in containers is exposed to heat and wind so they require frequent, often daily, watering.
Don’t let this need for frequent watering or past challenges discourage you from growing in pots. Enlist one or more of these strategies to eliminate the daily burden of watering and increase success while still maintaining beautiful and productive container gardens.
Selecting the Container
- Use a container with drainage holes to prevent soggy soil and root rot. Even if you can provide exactly the right amount of water, frequent rains can over saturate the soil in containers that lack drainage holes.
- Or, invest in self-watering pots to extend the time between watering. Fill the reservoir in these containers as needed. The water moves from the reservoir to the soil as it begins to dry. This extends the time between watering. As your new plantings grow you will need to fill the reservoir more frequently. Make sure the container has a weep hole to allow excess water to drain out of the reservoir.
- Grow plants in large plastic, glazed or other less breathable material to extend the time between watering. The larger the pot and less breathable the container material the longer the soil stays moist. Small pots made of breathable materials like unglazed terra cotta dry out more quickly.
- Grow perennial flowers, vegetables, and fruit in weatherproof containers. Grow bags, resin, and fiberglass are a few that can hold up to year-round weather extremes.
Fill Your Container with a Quality Potting Mix
- Potting mixes usually contain inorganic and organic materials. Most are “soilless” consisting of peat moss, sphagnum moss, and compost for moisture retention, vermiculite or perlite for drainage but do not contain mineral soils such as sand or clay. They are lightweight and blended to hold moisture while draining well.
- Organic potting mixes free of pesticides and other contaminants are also available. Check the label for the word organic and OMRI (Organic Material Research Institute) certified to make sure the product is truly organic.
- Always check the label for the list of ingredients including any fertilizer, wetting agents or moisture retaining products. Look for potting mixes that are light, fluffy and moist. Avoid bags that are waterlogged and heavy. The mix can break down, become compacted and some of the slow-release fertilizer may be pre-released and damage young seedlings.
- Consider starting with fresh potting mix each year to reduce the risk of insect pests and disease. I know this is an added expense and hard to do. I use organic potting mixes so the used product gets added to my garden beds or compost pile.
- If you decide to reuse potting mix only do so from containers that did not suffer from insect or disease problems. Remove the dead plant material and mix in fresh potting mix and a slow release fertilizer. If possible, rotate your container plantings. Grow something different than was grown in that container and potting mix the previous year. This helps reduce the risk of disease and insect pests.
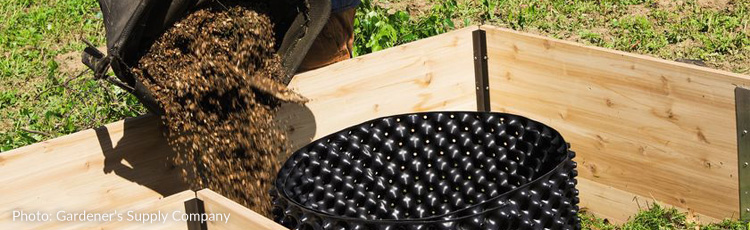
- Use less potting mix and reduce the weight of large containers by creating a false bottom. You can purchase products like Ups-A-Daisy or make your own. Place plastic bottles, cell packs, aluminum cans or other items in the bottom of the pot. Cover these with landscape fabric that allows water through to the drainage holes but prevents the potting mix from filtering down into the space below.
- Protect your patio and deck with the help of pot feet or other surface saving devices. These elevate the pots above the surface allowing the containers to drain freely and reduce the risk of mold and discoloration of the surface below.
Watering & Fertilizing Containers
- Check containers daily and water thoroughly when the top few inches of soil are just starting to dry. I find my finger is the best moisture meter. As you become more experienced you may use other clues to decide when to water. When pots are much lighter and plant leaves turn a gray-green the soil is dry and its time to water.
- Always water thoroughly until some water drips out of the drainage holes. That way you know you have moistened all the soil so plants develop a robust more drought tolerant root system.
- Extend the time between watering by adding a long lasting sustainable water saving product like Wild Valley Wool Pellets to your potting mix. This organic product is made from belly wool and tags that cannot be used for clothing. The pellets promote healthier growth, increase soil aeration and reduce watering frequency by as much as 25%.
- Enlist the help of products like Plant Nannies, Aqua Cones, and similar devices to further extend the time between watering. These provide additional water as the soil dries. Test the system before leaving town. You may need several of these devices for larger containers and longer absences.
- Mulch the soil surface in newly planted container gardens. This common garden practice is often overlooked when growing in containers. Cover the soil surface with shredded leaves, evergreen needles or other organic material. This helps conserve moisture until plants grow and shade the soil.
- Automate watering with one of the many commercial or DIY container irrigation systems. These are designed to provide water to each individual pot with the turn of the faucet. Attach the irrigation system to the faucet, add a timer and watering becomes a breeze. Regularly check the system to make sure the lines that deliver water to the pot are intact and the watering frequency is adjusted throughout the growing season as needed.
- Incorporate fertilizer into the potting mix at planting if it does not contain added plant nutrients. Follow label directions for timing and application rates. Reduce maintenance by using a slow release fertilizer that provides small amounts of nutrients to the plants over a long period of time. I use Milorganite that I apply at planting and a second time, only if needed, 6 to 8 weeks later. It is low nitrogen and won’t interfere with flowering and fruiting or damage plants when the weather turns hot and dry. University research found it also boosted tomato production.
- Milorganite Application Rates for Containers
- 2 T for 1 gallon pot
- 4 T for 2 gallon pot
- 2/3 cups for 5 gallon pot
- Milorganite Application Rates for Containers
Plants for Your Containers
- You can grow just about any plant in a pot as long as it is large enough to accommodate its size and you can provide the needed water and nutrients. Selecting compact varieties and those most suited to container gardening reduces maintenances and increases success.
- As always make sure the plants are suited to the growing conditions. Consider the sunlight the plants will receive, wind exposure, temperature and care you can provide. Matching the plants to the growing conditions means less effort is needed to grow healthy, productive and beautiful plants.
- Maximize your vegetable plants’ productivity by growing each plant in its own pot. Large tomatoes need 5 gallon pots while smaller varieties can grow in 3 gallon pots. Some research suggests growing in a pot that is at least 14”, preferably 20” wide, will yield greater results.
- Peppers, eggplants, broccoli and others vegetables of similar mature size grow well in 2 to 3 gallon pots. Root crops like radishes, beets and onions thrive in various sized containers. Use half long or other small rooted carrots with shorter roots that are easier to accommodate in a pot.
- Or mix in flowers and herbs for a colorful and edible garden in a container. You will have a smaller harvest but added beauty and flavor. The other option is to create a garden with a variety of containers placed close together with each one housing an individual flower, herb or vegetable.
- Perennial flowers and vegetables, trees, shrubs and fruit can be grown in containers. Look for dwarf varieties of larger scale plants bred for small space and container gardens.
- These plants will need extra winter protection in cold climates. The small volume of soil does not usually provide the needed insulation for roots to survive cold winter temperatures. Here are a couple ways to overwinter these plants:
- Move the containers to a sheltered location, cover the pots with mulch, bags of leaves or other material to protect the roots.
- Bury the pot in a vacant spot in the garden where soil provides the needed root insulation.
- Move containers to an unheated garage and water when the soil is thawed and dry. I provide added insulation to those I store in my unheated garage.
- Plants that are one zone hardier than your growing location and in large weather-proof pots can be left outdoors and usually survive without additional insulation.
- These plants will need extra winter protection in cold climates. The small volume of soil does not usually provide the needed insulation for roots to survive cold winter temperatures. Here are a couple ways to overwinter these plants:
Interested in Growing Fruit?
Here is some information to help you get started:
On Display at Energy Park
- Elevated Planter Box and Space Making Pivoting Trellis Set
- Plant-a-Bar Cocktail Garden Plan from Gardener's Supply Company
For more container gardening information consider watching these free webinar recordings and downloading the handouts.
- Growing Nutritious Herbs & Vegetables in a Garden or Container webinar (password: MWc3&8!u and handout
- Creative Container Gardening webinar (password: gF.9y3$f) and handout
- Food Gardening in Containers webinar (password: .%P5yYRV) and handout
Tips for Growing Your Favorite Vegetables
We all have those vegetables we must include in our gardens to enjoy snacking on and in meals. Knowing some of the basic care and common problems can boost your enjoyment. Keep these tips in mind when growing your favorite vegetables.
- Time your plantings properly and harvest for the plants you are growing
- Peas, spinach and most greens thrive and taste best in cooler weather
- A spring planting for an early summer harvest or midsummer planting for a fall harvest provides the best results.
- Tomatoes, peppers, eggplants and squash prefer warmer soil and air temperatures.
- Waiting for warmer conditions will increase success and reduce the time to harvest.
- Peas, spinach and most greens thrive and taste best in cooler weather
- Provide a healthy soil foundation. Compost enriched soil encourages healthy plant growth less susceptible to drought, pest and disease.
- Use a soil test report so you apply the right type and amount of fertilizer for the plants you are growing. A low nitrogen, slow-release fertilizer like Milorganite provides needed nutrients for a longer period and won’t damage plants when the weather turns hot and dry.
- Provide adequate moisture throughout the growing season to keep plants healthy and increase the flavor and productivity.
- Regularly harvesting when vegetables are at their peak will result in the best flavor and nutritional value. It also keeps the plants producing which will increase your harvest.
- Remove weeds that compete with your plants for water and nutrients. This also reduces the risk of insect pests and diseases as many weeds are host plants for garden pests.
- Mulch the soil with leaves or evergreen needles to suppress weeds, conserve moisture and improve the soil as they decompose.
- Manage insect and disease problems in the most environmentally friendly way. Tolerate some damage and wait for songbirds and predators to eat the problem. Sanitation, removing infected plant parts when found or during fall cleanup can help reduce the spread of disease. Look for organic products like Summit Year Round Spray Oil to manage powdery mildew and various pests. Plantskydd organic rain resistant animal repellent will help protect plants from deer, rabbits, voles and more.
Watch the free webinar recording (password: U0f4rF%^) Organic Pest Management for Vegetable and Flower Gardens and download the handout.
More About a Few of the More Popular Vegetables
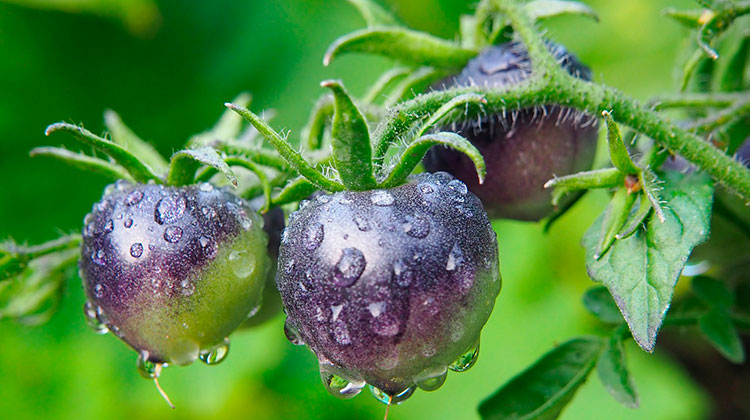
Tomatoes
- Choose the Best Tomato for Your Favorite Recipes
- How to Grow Your Best Tomato
- Start seeds indoors in early April
- Move transplants into the garden in late May to early June when soil and air are warm
- Trench tomatoes only
- Trench tall, leggy plants to encourage rooting
- Grow sprawled, staked, towered, hanging, in a 3- to 5-gallon container, hanging basket
- Space 24-36”
- Determinate - grows to certain height and stops - good for containers
- Indeterminate - grows, flowers and fruits until frost kills
- Pinch tips late season to speed ripening of existing fruit
- Growing Tomatoes
- Hot and Cold Weather Tomatoes
- Planting Tomatoes
- Tomato Growing Tips
- A few AAS Winners to try:
- Patio Choice Yellow - cherry tomato
- Apple Yellow
- Early Resilience - Roma
- Galahad - slicer, late blight resistance
- Tomato troubles
- Septoria leaf spot
- Temperature extremes can prevent fruiting, cause misshapen fruit or reduce the size of your tomato harvest. When daytime temperatures rise above 90°F and night temperatures remain above 70° F blossom drop and poor fruit development may occur. When humidity is low the pollen is not viable. In hot and humid conditions the pollen is too sticky and doesn’t move from the male to the female part of the flower.
- Cool weather can result in poor fruiting. Night temperatures below the optimum of 59° to 68°F will reduce the amount and viability of pollen that the plant produces. Less viable pollen means fewer fruit will form. Cooler temperatures below 55°F can result in misshapen fruit and catfacing. Fortunately the malformed fruit is still tasty and safe to eat.
For more information watch Tomatoes: Tips & Tricks to Maximize Your Harvest & Minimize Insect & Disease Problems free webinar (password: vM$48Cx!) and download the handout
Peppers
- Start seeds indoors in early April
- Move transplants into the garden in late May to early June when soil and air are warm
- Plant at same depth as growing in container
- Grow in ground or in a 2- to 3-gallon container
- Space 18” apart
- Sweet, hot or ornamental
- Harvest in 60 to 70 days - fruit is firm and fully colored
- A few to try:
- Sweet - Bell Boy (AAS), Lady Bell, Just Sweet, Lunchbox, Sweetie Pie (AAS, smaller bell), Giant Marconi (AAS, raw or grilling), Gypsy (AAS), Sweet Banana
- Hot - Cayenne, Jalapeño, MexiBell (AAS), Mad Hatter (AAS)
- Other - Shishito (occasional hot one, char-grilled or pan seared), Roulette (AAS, resembles habanero with no heat)
- Temperature extremes impact pepper productivity. When temperatures are 95°F or higher the pollen is sterile and flowers may drop. Small fruit may also fall from the plant during such hot spells. Pepper plants also experience poor fruit set when night temperatures drop below 60°F or rise above 75° F.
Cucumbers
- Plant in late May when the air and soil are warm
- Grow sprawled on ground in rows or hills, trained on support or in container
- First flush of flowers are male
- Second flush contains both male and female flowers for pollination to occur and fruit can form
- Harvest
- Sweet pickles 1.5 to 2.5”
- Dills 3-4”
- Slicing 6-9”, skin bright green
- Burpless 10-12”
- A few to try:
- Pickles - Bush Pickle, Carolina, Parisian Gherkin (AAS)
- Long slicers - Burpless, Marketmore 76, Straight 8 (AAS)
- Long slicers (compact) - Bush Crop, Fanfare, Pick a Bushel (AAS), Salad Bush (AAS), Green Light (AAS)
- Lots of Flowers, But No Fruit on Cucumbers, Squash and Melons
- Cucumber Beetles and Bacterial Wilt
- Cucumber and squash plants produce separate male and female flowers. Research found cool temperatures, bright sunlight, and shorter days encourage female flower production while male flowers are more prolific during warmer temperatures, less sunlight and close spacing. Flowering on squash and cucumbers is also impacted by nitrogen fertilization. Too much can prevent female flower formation while insufficient amounts can reduce the number of male flowers. You need both male and female flowers on the plant for pollination, fertilization and fruit formation to occur.
Beans
- Plant in mid May - several weeks before tomato and eggplants - through early August
- Grow in ground, raised beds or containers
- Harvest in 50 to 80 days
- Snap - before seeds swell and show
- Dry - outer shell dry
- A few to try:
- Bush - Blue Lake, Contender, Kentucky Blue (AAS), Tendercrop, Mascotte (AAS container)
- Bush yellow - Cherokee Wax (AAS), Slender Wax
- Pole - Scarlet Runner, Rattlesnake Pole, Purple Podded, Yardlong
- Lima - Burpee Improved Bush, Fordhook 242 (AAS), Baby Fordhook
- Eco-friendly Control of Bean Beetles
- Clean up in fall
- Cover with floating row cover - beans do not need bees for pollination
- Seed corn maggot
- Replant damaged rows
- Wait for soil to warm for planting
Peas
- Plant mid April or mid to late summer for fall harvest (need cooler temperatures)
- Harvest in 60 to 70 days
- Edible pod - swollen / no seeds showing
- Peas - pod bright, swollen, peas full-size
- Garden Snow and Snap Peas
- A few to try:
- Peas - Mr. Big (AAS), Green Arrow, First 13
- Snow peas - Mammoth Melting, Oregon Giant
- Edible podded - Sugar Snap (AAS), Sugar Daddy, Sugar Ann (AAS), Patio Pride (AAS container), Snak Hero (AAS)
- Powdery mildew usually only a problem as temperatures and humidity rise
- Plant for early summer and fall harvests
Root Crops: Carrots, Beets, Radishes
- Plant mid to late April and throughout the season (planting and thinning tricks)
- Pelletized seeds and seed tapes make planting smaller seeds easier
- Grow in containers, raised beds, in ground
- Space 2-3”
- Harvest
- A few to try:
- Carrots - Shorts and Half Long, Purple Haze (AAS), Thumbelina (AAS)
- Beets - Bull’s Blood, Tall Top, Fresh Start, Candy Stripe, Golden, Avalanche (AAS, white)
- Radishes - Watermelon, Easter Egg, Cherry Bell (AAS), French Breakfast, Sweet Baby (AAS)
- Interplant radishes with carrots
- When radishes are ready to harvest, gives carrot room to mature
- Overwinter in garden
- Mulch soil when crunchy
- Harvest during winter thaw
Cabbage, Broccoli, Cauliflower, Brussels Sprouts
- Plant early May, protect plants from frost and mid season for fall harvest
- Harvest
- Cabbage - when head is full size and firm - cut, leaving lower leaves for additional heads
- Broccoli - when flowerhead is full size, before buds open, leave stem for re-sprouting
- Cauliflower - blanch when head is size of quarter - ready in 5 to 7 days
- Brussels Sprouts - harvest when sprouts are firm and 1” in diameter
- A few to try:
- Cabbage - AAS Winners - Katarina (container), Savoy Express, Savoy King, Ruby Ball
- Broccoli - Crosier, Green Comet (AAS), Green Goliath, Artwork (AAS - stem type)
- Cauliflower - Snow Crown (AAS), Snow King (AAS), Violet Queen, Green Goddess Hybrid
- Brussels sprouts - Hestia (AAS), Redarling, Long Island
- Eco-friendly Control of Cabbage Worms
- Cover with floating row cover to prevent egg laying
- Btk organic insecticide that only kills true caterpillars
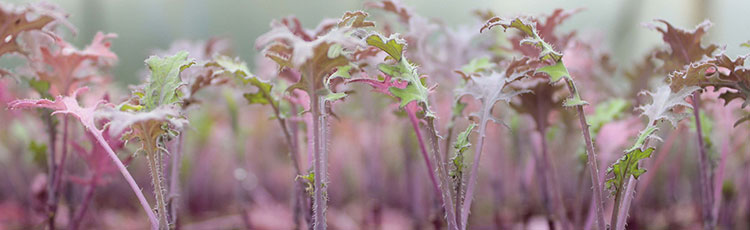
Lettuce, Spinach, Greens
- Plant early spring (mid to late April) through late season for fall harvest, most thrive in cooler temperatures
- Harvest outer leaves of leafy crops when 4-6”, head (loose and firm)
- A few to try:
- Lettuce
- Leaf types - Oak Leaf, Simpson, Salad Bowl (AAS), Galactic, Freckles
- Butterhead - Bibb, Summer Bibb, Buttercrunch (AAS), Little Gem
- Romaine - Red Romaine
- Other greens
- Cresses - Upland, Curly
- Endive and escarole, chicories - Lorca, Ruffec, Salad King, Cos Batavian (AAS)
- Chinese cabbage - Asian Delight (AAS, slow to bolt)
- Mache or corn salad - fist size rosette of leaves
- Radichio head-forming chicory - Chioggia (tangy to bitter flavor)
- Mustard - Red Kingdom Mizuna (AAS)
- Kale - Prizm (AAS), Lacinato, Redbor, Tuscan Baby Leaf
- Spinach - America (AAS), Bloomsdale Long Standing, New Zealand (more heat tolerant)
- Malabar Climbing Spinach - not a true spinach, more heat tolerant
- Swiss Chard - Bright Lights (AAS), Peppermint
- Lettuce
Squash and Melons
- Plant when the air and soil are warm, additional plantings through mid summer
- Grow sprawled on ground in rows or hills, trained on support or in container, sling large fruit
- First flush of flowers are male
- Second flush contains both male and female flowers for pollination to occur and fruit can form
- Harvest
- Summer Squash - when fruit are 6-10” long or 3-6” in diameter
- Winter Squash - when full size, rind is hard, portion touching the ground is cream or orange
- Melons - 65 to 90 days, fruit full size, rind is dull, ground spot cream, tendrils dry and curled
- A few to try:
- Summer squash - Black Beauty(AAS), Bossa Nova (AAS), Gold Rush (AAS), Fordhook (AAS), Papaya Pear (AAS), Sunburst, Butterstick (yellow), Eight Ball (AAS, round), Astia (container), Butter Blossom (flowers)
- Winter squash - Cream of the Crop (AAS), Table Queen (AAS), Table King (AAS), Bush Delicata (AAS), Sweet Dumpling, Early Butterbush, Vegetable Spaghetti, Early Butternut (AAS), Buttercup, Mooregold, Sweet Mama (AAS)
- Muskmelons - Bush Star (compact), Earli Sweet, Superstar, Orange SilverWave (AAS)
- Honeydews - Earli Dew, Honey Brew, Morning Ice, Venus
- Watermelon
- Early - Sugar Baby, Yellow Baby (AAS), Cal Sweet Bush (AAS, very compact)
- Main - Mini Love (compact, small fruit), Moon and Stars, Sweet Beauty (AAS, small fruit), Sweet Favorite (AAS)
- Seedless - Cotton Candy, Queen of Hearts
- Harvesting and Storing Pumpkins
- Preventing Squash Vine Borer Damage
- Protect Pumpkins, Squash and Melons From Rot
Thank you to We Energies for sponsoring my appearances.
Thanks for the generous donations of plants, educational materials, giveaways and more from:
- American Transmission Co. & GrowSmart
- Aquatic Invasive Species UW Extension & Natural Resources Institute
- Classic Gardens
- Corona Tools
- Diggers Hotline
- Ebert's Greenhouse Village
- Fresh Coast Guardians
- Gardener's Supply Company
- Groth's Country Gardens
- Longfield Gardens
- Milorganite
- Plantskydd Animal Repellent
- Summit® Mosquito Dunks & Year-Round Spray Oil
- Wild Valley Farms Wool Pellets
And my team: Dawn Stark, Diana Paul, Maya Espino, Nevada Myers Wesley, Jerry Scheafer, Julie Brothen & Kathleen McLaughlin
Related
Upcoming Live Events
& Webinars
April 27, 2024
Ridges & Rivers Book Festival
Viroqua, WI
Register now
April 28, 2024
Flowering Trees and Shrubs
Ebert's Greenhouse Village, Ixonia, WI
May 1, 2024
FREE WEBINAR
Ornamental Fruits and Vegetables
Register now
May 4, 2024
Garden U 2024
New Richmond, WI
Register now
May 9, 2024
FREE WEBINAR
How to Plant Your Rain Garden
Register now
May 11, 2024
Ask The Plant Doctor Q & A
Ebert's Greenhouse Village, Ixonia, WI
May 12, 2024
Ask The Plant Doctor Q & A
Ebert's Greenhouse Village, Ixonia, WI
May 18, 2024
Ask The Plant Doctor Q & A
Ebert's Greenhouse Village, Ixonia, WI
June 1, 2024
Selecting, Planting, Pruning and Caring for Hydrangeas
Ebert's Greenhouse Village, Ixonia, WI
June 5, 2024
FREE WEBINAR
Under-Appreciated Pollinators
Register now
WATCH ON-DEMAND WEBINARS
Learn More
Book an Appearance
Enter to Win The Birds & Blooms' Ultimate Gardening Guide !